
 silicone@silic0ne.com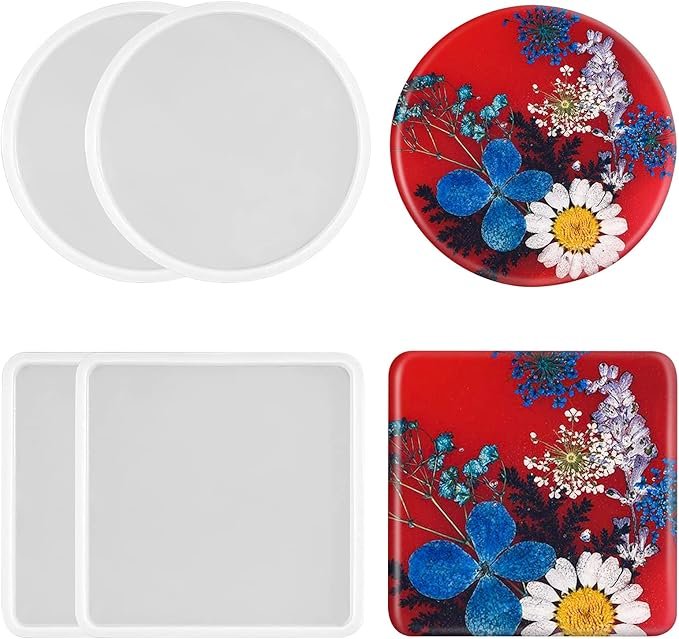
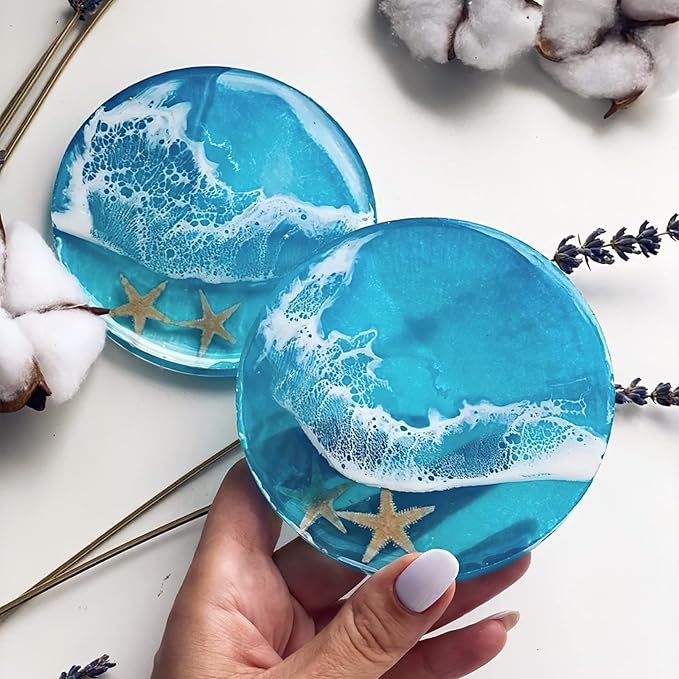
You have seen them on Instagram. Those glossy, jewel-like coasters swirling with gold leaf and dried flowers. The ones that look like they belong in a boutique home décor store with a price tag that makes you wince. You have scrolled past videos of resin artists popping perfect, shimmering creations out of silicone molds, and you have thought the same thing we all think: I could never do that.
But here is the secret the resin community has known for years: you absolutely can. And the journey begins with the right mold.
The 4 PCS Thickened Coaster Resin Molds are not just another crafting supply. They are your invitation into a world of creative freedom – a world where you mix colors, embed treasures, and produce functional art that friends will beg you to make for them. With two square molds (each approximately 4.13 x 4.13 inches) and two round molds (3.5 inches in diameter), this set gives you the perfect canvas to start your resin journey. They are thickened, flexible, reusable, and surprisingly affordable.
Let us pour ourselves into the details.
Chapter One: Why Coasters? The Perfect First Resin Project
If you have never worked with epoxy resin before, coasters are the ideal starting point. Here is why:
Small scale, big impact. A coaster uses just enough resin to feel substantial but not so much that mistakes become expensive. You can experiment with colors, inclusions, and techniques without fear of wasting materials.
Flat and forgiving. Unlike deep casting molds (which require layering to prevent overheating) or complex shapes (which trap bubbles), coaster molds are shallow and open. Bubbles rise to the surface easily. Heat guns or torches can pop them with a quick pass.
Instantly useful. A failed coaster is still a cute little trinket tray for your desk. A successful coaster protects your furniture and sparks conversations. Either way, you have made something that serves a purpose.
Endlessly giftable. Four coasters make a complete set. Wrap them in tissue paper with a ribbon, and you have a handmade gift that feels luxurious. Wedding showers, housewarmings, birthdays, Christmas – resin coasters are always welcome.
The included set of two square and two round molds gives you variety. Mix and match shapes for a cohesive but eclectic set. Or make all four in the same style for a uniform look. The choice is yours – which is exactly the point.
Chapter Two: Thickened Silicone – The Engineering Behind Easy Demolding

Let us talk about the single most frustrating moment in resin crafting: demolding.
You have waited 24 hours (or more, depending on your resin). You are excited. You flip the mold over. You pull. And instead of a beautiful coaster dropping into your hand, the mold stretches, distorts, and – if it is a cheap mold – tears at the edges. Your heart sinks. Your hours of work, ruined by a flimsy piece of silicone.
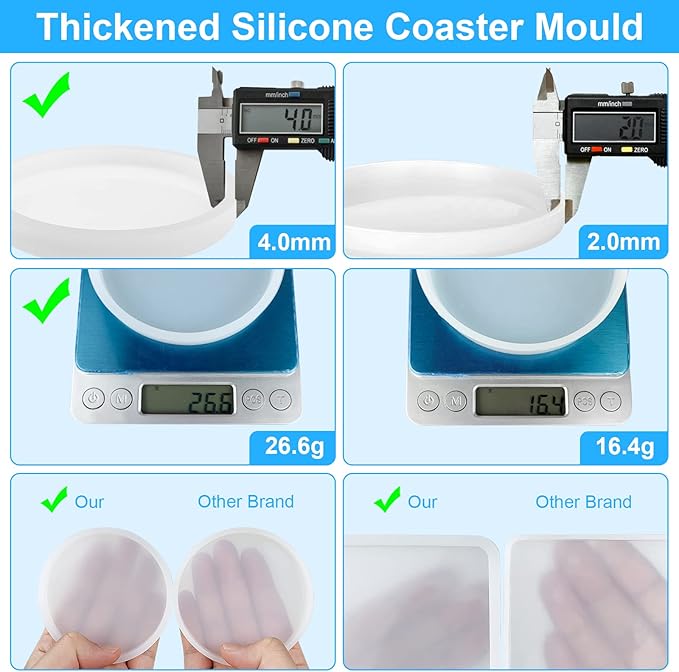
The manufacturers of this coaster mold set have clearly experienced that pain themselves. Their solution: thickened silicone.
What “thickened” means in practice:
- The walls of the mold are substantially thicker than bargain-bin molds (often 2-3mm or more)
- The base is reinforced, preventing the “dome” effect where the center of your coaster ends up thicker than the edges
- The overall structure holds its shape even when filled with heavy resin
- During demolding, the extra thickness prevents tearing and stretching
Why silicone is the right material for resin molds:
- Non-stick: Nothing bonds permanently to silicone. Cured resin releases effortlessly.
- Flexible: You can twist, bend, and peel the mold away from your casting without breaking either.
- Heat resistant: Epoxy resin generates heat as it cures (exothermic reaction). Silicone handles it easily.
- Reusable: A good silicone mold lasts for dozens – sometimes hundreds – of castings.
The set is described as non-toxic, safe, and odorless. This matters because you will be working in your home, likely at your kitchen table or craft desk. No chemical smells leaching from the mold itself (the resin is another story – always use resin in a well-ventilated area).
Smoothness is the final piece of the material puzzle. The interior surfaces of these molds are polished smooth, which means your coasters come out with a glossy, flawless finish. No sanding required (unless you want to). No weird texture transferred from the mold.
Chapter Three: Easy Demolding and Cleaning – The Joy of Low-Friction Crafting
Let us walk through the actual process of using these molds, because a product is only as good as its user experience.
Step 1: Preparation
Place your molds on a perfectly level surface. Use a bubble level if you are unsure. Unlevel molds produce coasters that are thicker on one side – still usable but less professional.
Step 2: Mixing and pouring
Mix your epoxy resin according to the manufacturer’s instructions (usually a 1:1 ratio by volume or weight). Stir slowly to minimize bubbles. Pour into the molds. Tilt the molds to spread the resin evenly, or use a toothpick to guide it into corners.
Step 3: Adding embellishments
This is where creativity explodes. Drop in dried flowers. Sprinkle glitter. Swirl in alcohol inks. Lay gold leaf. Place small stones or shells. Pop bubbles with a heat gun or torch (brief passes – do not melt the silicone).
Step 4: Curing
Cover the molds with a dust cover (cardboard box works) and wait. Cure times vary by resin brand, typically 12-24 hours for demold, 72 hours for full hardness.
Step 5: Demolding
Here is where the thickened silicone earns its keep. Gently pull the edges of the mold away from the coaster. Twist the mold slightly. The coaster should release easily. If it resists, wait longer – the resin may not be fully cured. Do not force it.
Step 6: Cleaning
Rinse the molds with warm soapy water. Dry thoroughly. Store flat to prevent warping. That is it. No scrubbing. No scraping. The non-stick surface means leftover resin peels right off.
The entire process, from pour to finished coaster, requires no special skills – just patience and a willingness to experiment.
Chapter Four: Creative DIY Projects – Dried Flowers, Glitter, Foil, and Beyond

The molds themselves are just the beginning. The real magic happens when you start adding inclusions.
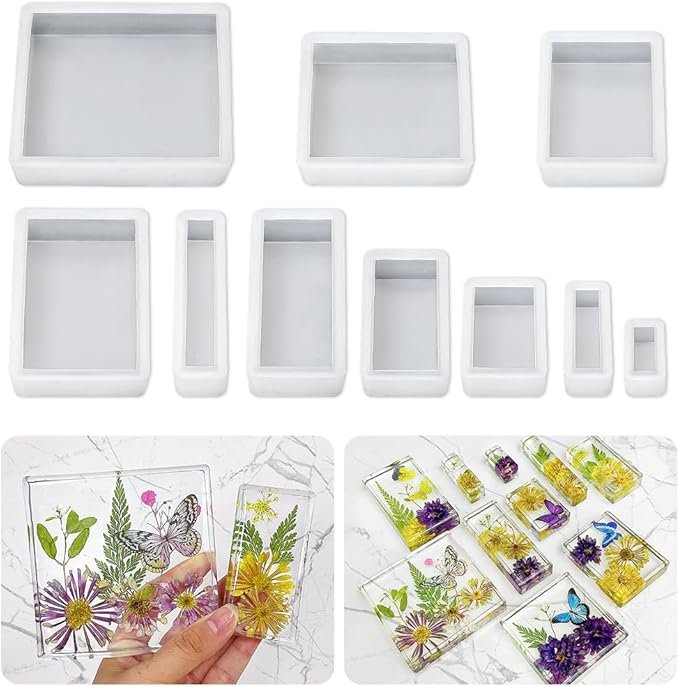
Dried flowers and leaves: Pressed hydrangeas, baby’s breath, rose petals, ferns – any flat, dry botanical works. Seal them with a thin layer of resin first (brush on, let tack up) to prevent bubbles from escaping the petals. Then pour the rest of the resin.
Glitter and mica powders: Mix directly into your resin for an all-over shimmer, or sprinkle between layers for depth. Fine glitter works better than chunky glitter, which can sink.
Alcohol inks: Drop them onto the surface of poured resin and swirl with a toothpick for psychedelic, marbled effects. White ink added last creates dramatic cells and patterns.
Gold, silver, or copper leaf: Crumble leaf fragments into the resin or apply whole sheets. The leaf floats beautifully, catching light from every angle.
Stones, shells, and beads: Heavier inclusions may sink to the bottom of the mold. Counter by pouring a thin layer, letting it partially cure (tacky but not liquid), placing your inclusions, then pouring the remaining resin.
Pigment pastes and powders: For opaque, vibrant colors rather than transparent effects.
Word of wisdom: Keep a notebook. Write down exactly what you added to each coaster – colors, amounts, techniques. Nothing is worse than creating a perfect coaster and having no idea how to replicate it.
The mold set is compatible with most resins and casting materials – epoxy, UV resin (though UV requires transparent molds, which these are), and even some plasters or clays. Experiment safely.
Chapter Five: Versatile Uses – Beyond Coasters

While these molds are designed for coasters, creative crafters will find dozens of additional uses.
Bowl mats / trivets: The same coasters that protect your coffee table from condensation also protect your dining table from hot pots. Resin is heat resistant but not heatproof – use a trivet for pots straight from the stove. For warm dishes, resin coasters work beautifully.
Candle holders: Place a small tealight or votive candle on a finished coaster. The resin reflects candlelight gorgeously. For larger candles, consider a deeper mold, but for standard votives, these coasters are perfect.
Jewelry trays: A single coaster on a nightstand or dresser catches rings, earrings, and watches. Much prettier than a plastic dish.
Small serving platters: Serve cheese and crackers? Use a coaster as an individual portion plate for appetizers.
Decorative wall art: Drill small holes (carefully, with a diamond bit) and hang your coasters as a cluster on a wall. Group square and round together for an organic gallery.
Gift toppers: Tie a finished coaster to a wrapped gift as an extra present on top of the present.
Petite trinket dishes: Keys, paperclips, loose change – coasters corral small items beautifully.
The point is: even if you make “too many” coasters (is there such a thing?), you will find places for them. They make the world slightly more beautiful, one small circle or square at a time.
Chapter Six: Perfect for Beginners – No Experience Required

Let us address the fear. Resin crafting looks intimidating. The videos make it seem like you need a studio full of equipment and years of practice. You do not.
Here is what you actually need to start:
- This mold set (obviously)
- Epoxy resin (buy a small starter kit from any craft store or online)
- Measuring cups and stir sticks
- Gloves and a respirator (safety first – resin fumes are not friends)
- A level surface covered with plastic or a silicone mat
- Your choice of colors and inclusions
Here is what you do NOT need:
- A pressure pot (for bubble-free castings – nice but not necessary for coasters)
- A heat gun (a hairdryer works for popping surface bubbles)
- Years of experience
- Perfect artistic ability
The learning curve is gentle. Your first coaster might have a few bubbles. Your second will be better. Your fourth will be gift-worthy. By the time you finish the set, you will be brainstorming what to make next (trays? keychains? bookmarks?).
The molds themselves are forgiving. If a coaster does not turn out perfectly, you can sand the edges, apply a fresh top coat of resin, or simply call it “rustic” and move on. Imperfections add character.
Chapter Seven: Dimensions – The Perfect Coaster Size

Let us get specific about measurements because size matters in coaster land.
Square molds: Approximately 4.13 x 4.13 inches (105 x 105 mm) with a thickness of about 0.16 inches (4 mm).
Round molds: Approximately 3.5 inches (89 mm) in diameter with the same 0.16-inch thickness.
Why these dimensions work:
- 4-inch squares fit most coffee mugs, tea cups, and water glasses comfortably with margin to spare. Large enough for a coffee mug with a handle, small enough to not dominate your table.
- 3.5-inch rounds are classic coaster size – slightly smaller than the squares, which creates visual interest when you mix sets.
- 0.16-inch thickness is substantial without being chunky. Thin enough to stack easily, thick enough to feel durable and not flimsy.
Comparison to standard coasters: Most commercial coasters are 3.5-4 inches in diameter and 0.125-0.25 inches thick. These molds produce coasters right in that sweet spot.
The slight size difference between square and round (4.13 vs 3.5 inches) is actually a design feature. A mixed set of four coasters – two squares, two rounds – looks intentional and curated, not like a mismatched accident.
Chapter Eight: Endless Applications – Home, Work, Gifts, and Celebrations
Where will your finished coasters live?
At home: On your coffee table. On your nightstand. On your desk. In your entryway for keys and mail. These are not just functional objects; they are art you made yourself.
At work: Brighten your office desk with a handmade coaster. It is a conversation starter. Coworkers will ask where you bought it. You get to say, “I made it.”
In meeting rooms: Set of coasters in a conference room elevates the space. Much better than paper napkins or bare tables.
At celebrations: Housewarming gifts. Wedding favors (make 50 coasters in wedding colors). Birthday presents. Christmas ornaments (add a hanging loop before curing). Teacher appreciation gifts.
For social events: Host a resin night with friends. Each person makes their own set of coasters. You provide the molds (they clean and return them). Everyone leaves with custom art and a shared memory.
The emotional value of handmade gifts: A store-bought coaster set costs $10-20. A handmade coaster set costs about the same in materials but carries infinitely more meaning. You chose the colors. You embedded flowers from your garden. You thought of that person while you mixed and poured. That matters.
Chapter Nine: Package Inclusions and What You Need to Buy Separately
Included in this package:
- 2 square coaster molds (4.13 x 4.13 x 0.16 inches)
- 2 round coaster molds (3.5 inch diameter)
- That is it – the molds themselves
Not included (you provide):
- Epoxy resin (the actual casting material)
- Mixing cups, stir sticks, gloves
- Colorants (dyes, pigments, inks)
- Embellishments (dried flowers, glitter, leaf, stones)
- Heat gun or torch (optional but helpful)
- Level surface and dust cover
The molds are the investment. Everything else you can buy as needed, often in small quantities. Many crafters start with a 20resinstarterkitthatincludesresin,cups,sticks,andgloves–plusthesemolds–forunder40 total.
Customer service note: The listing includes a contact promise. If you have any problems with the molds – tearing, warping, defects – you can reach out. Good sellers stand behind their products.
Chapter Ten: Comparison – Thickened Silicone vs. Thin Molds
| Feature | Thickened Molds (This Set) | Thin Cheap Molds |
|---|---|---|
| Demolding ease | Easy – twists without tearing | Difficult – stretches, may rip |
| Lifespan | Hundreds of uses | Dozens of uses |
| Shape retention | Excellent – holds flat | Poor – warps under resin weight |
| Edge quality | Sharp, defined | Soft, rounded |
| Flashing (leaks) | Minimal | Common |
| Price per mold | Slightly higher | Very low |
| Value over time | High (buy once) | Low (replace often) |
The thickened silicone costs a little more upfront. It pays for itself after a few uses. Cheap molds that tear on the third demolding are actually more expensive in the long run – plus they add frustration to your creative process.
Conclusion: Your Resin Journey Starts Here
There is a unique satisfaction in making something beautiful with your own hands. Not assembling. Not following instructions. Actually creating – mixing colors, embedding treasures, pouring liquid that transforms into solid art before your eyes.
The 4 PCS Thickened Coaster Resin Molds are your gateway to that satisfaction. They are well-designed (thickened, flexible, smooth). They are versatile (square and round). They are forgiving (easy demolding, easy cleaning). And they are affordable enough to buy without guilt.
Make coasters for your own home. Make them as gifts. Make them as a relaxing weekend project. Make them with your kids (supervised – resin requires safety precautions). Make them alone with a podcast and a cup of tea.
Whatever you create, create it with joy.
Order your set today. Pour your first coaster. And discover the maker you have always been.